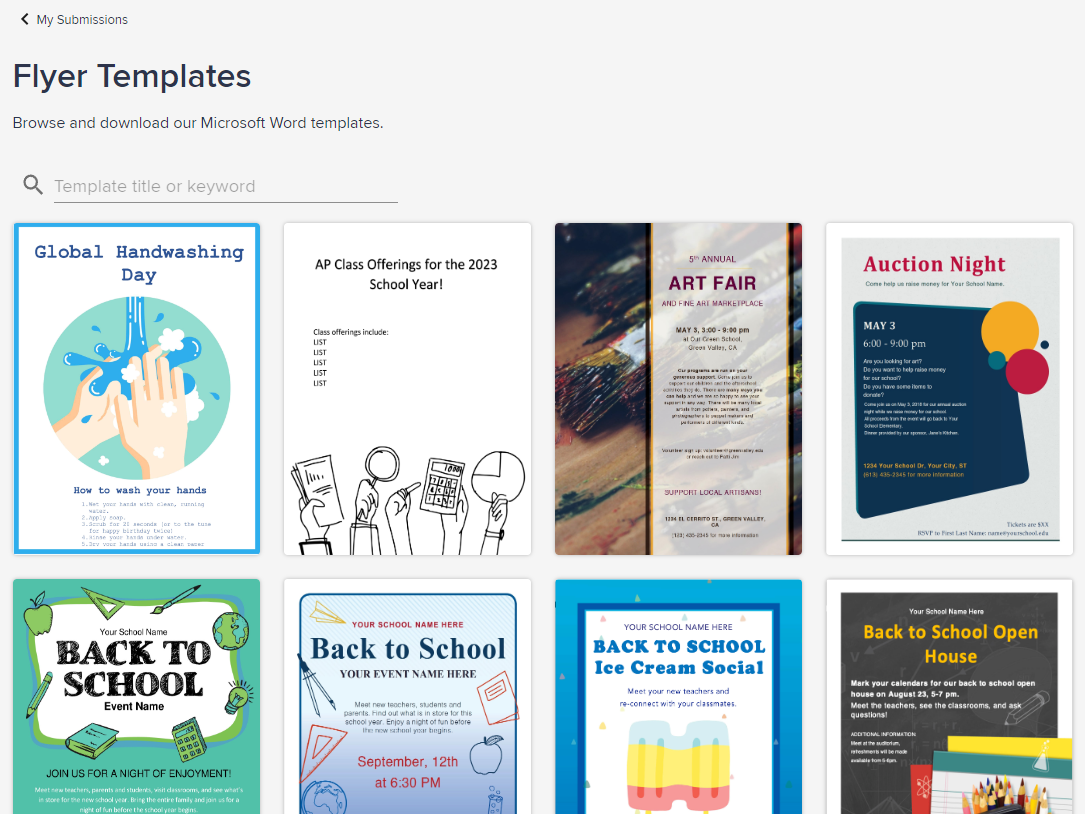
Peachjar offers a library of free Microsoft Word school flyer templates! To navigate to this page, go to Submissions and select the Browse Flyer Templates button in the top right.
Once you find a template you would like to use, hover over the template to select and download the file. Customize your flyer and save it as a PDF file to upload.
Submit your flyer to be distributed to parents at your selected schools. Your flyer will be posted on the selected schools’ web flyerboards and sent in an email notification to parents.
Use the following requirements and submit your first flyer, click on "Post & Notify."
Prepare Flyer
Use the following requirements:
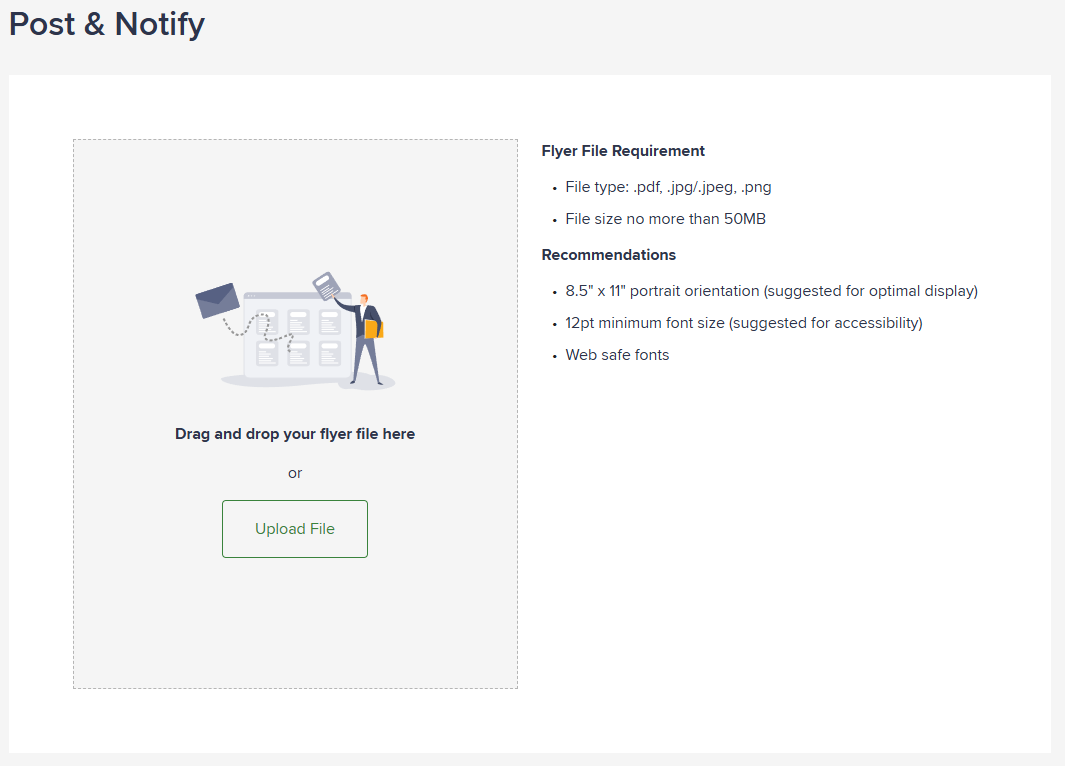
Supported file types: pdf, jpg/jpeg, png
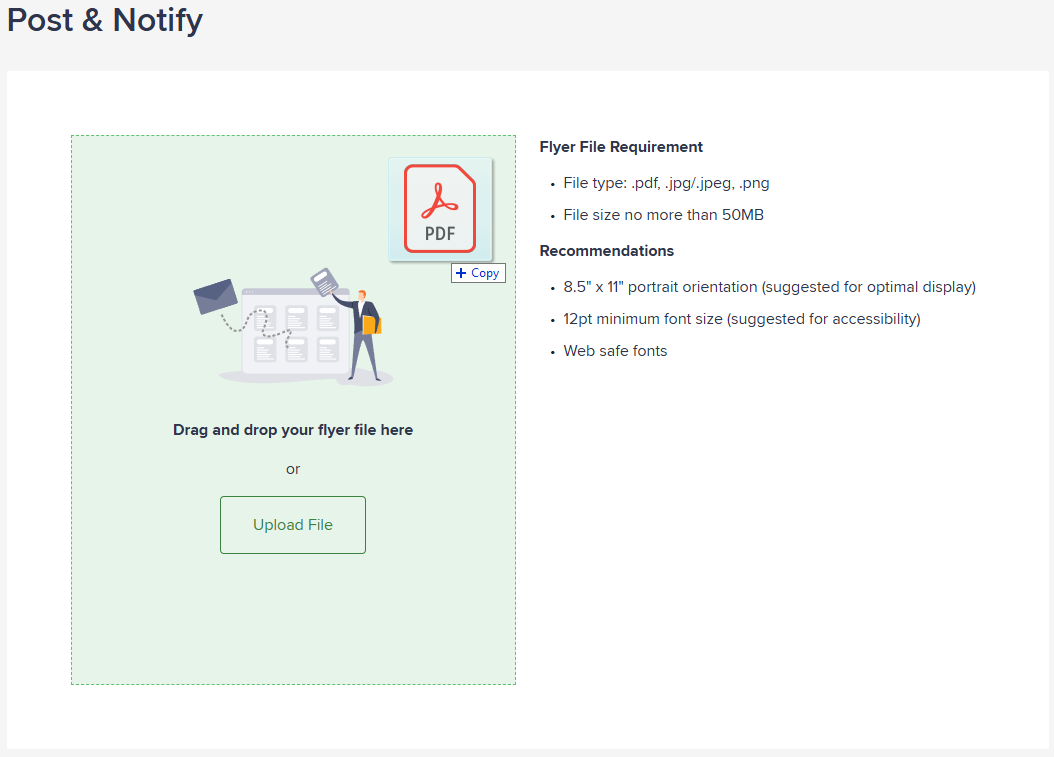
Upload Flyer
Once your flyer is in PDF format, click "Upload PDF File." Click "Continue to Flyer Review."
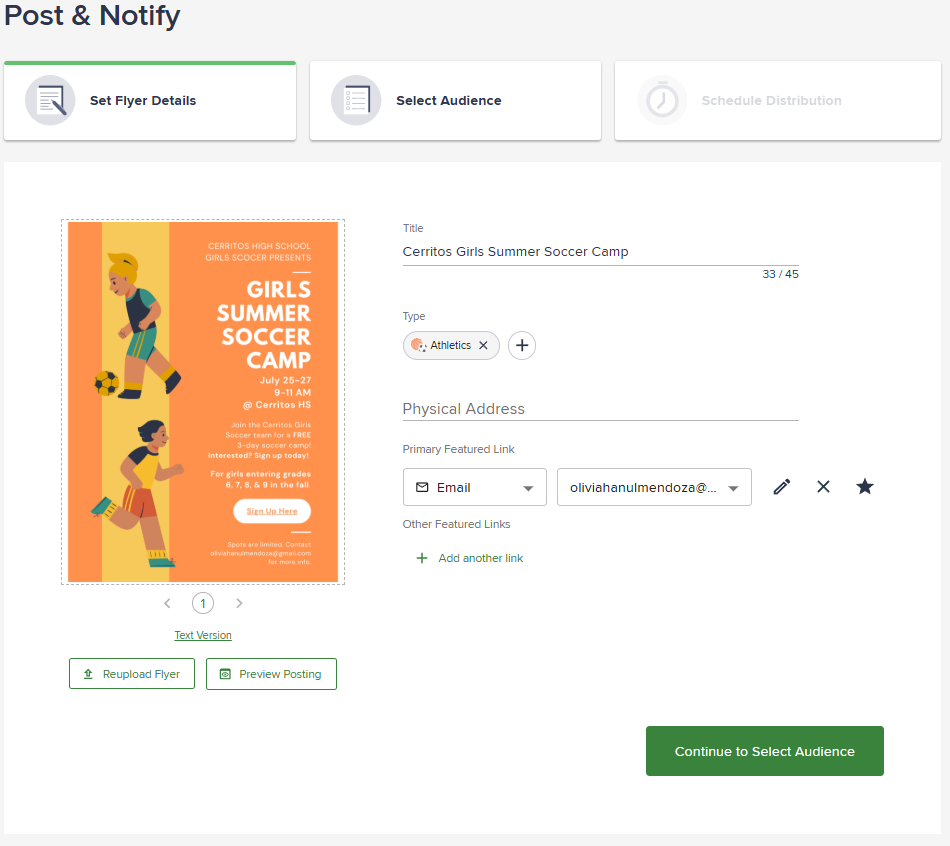
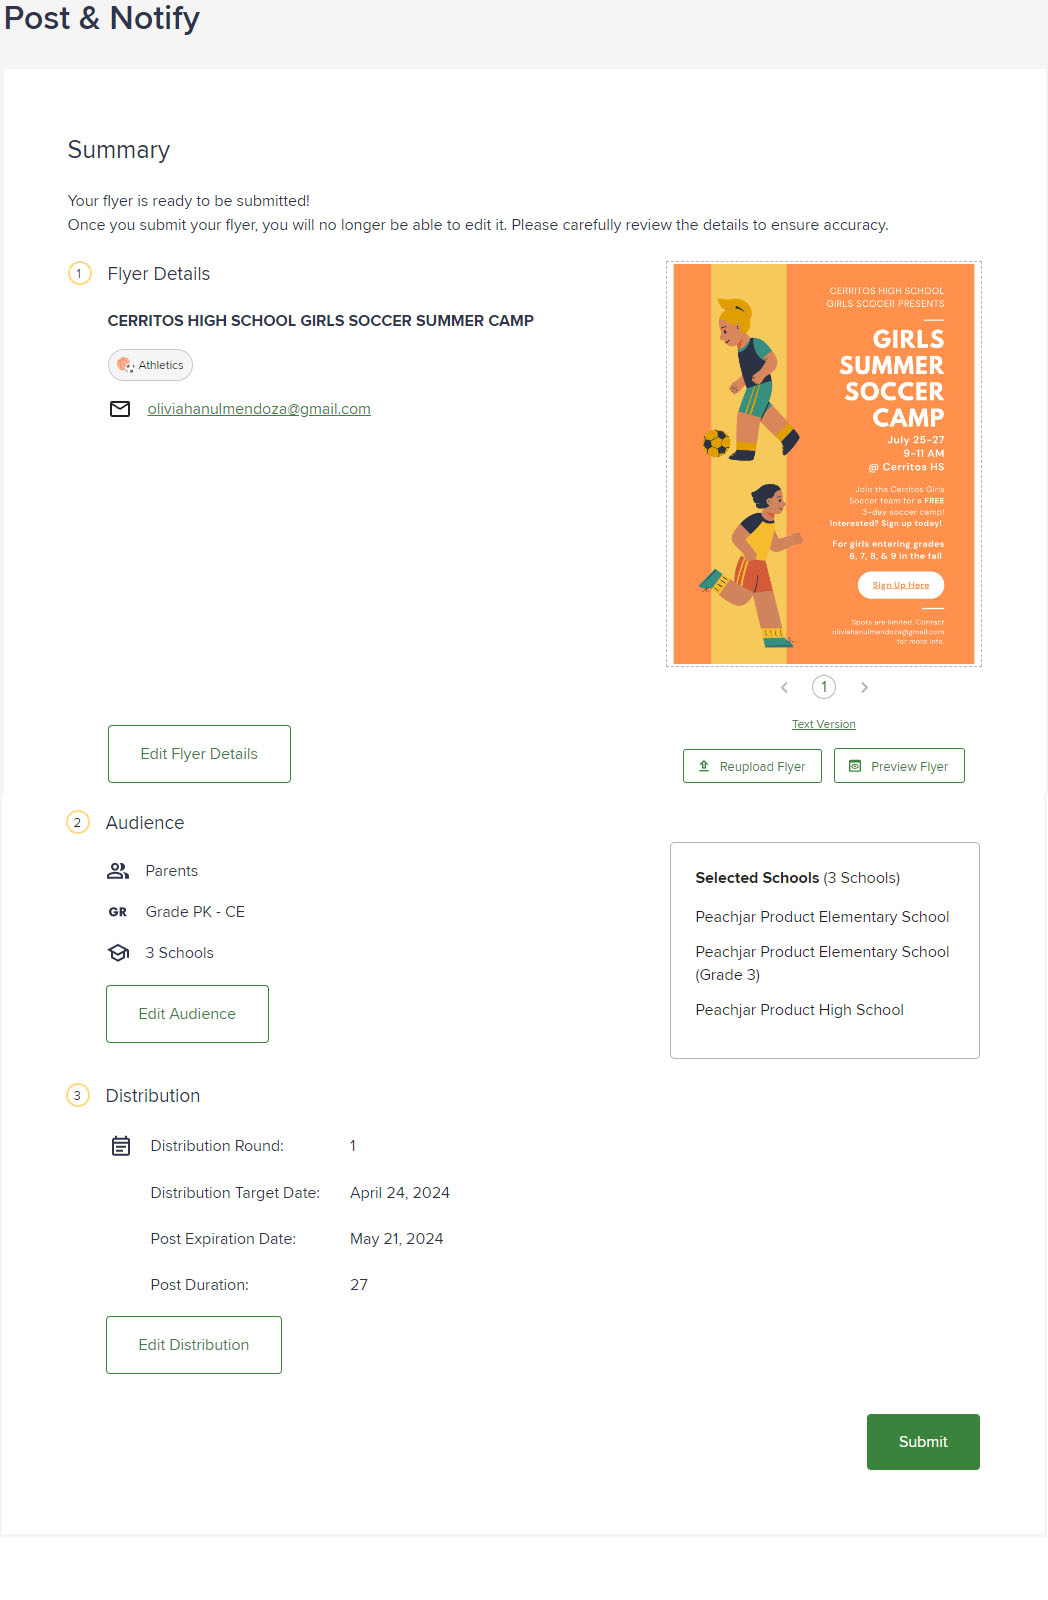
Set Flyer details
Specify everything from the event's title and type to its location and feature links. This step ensures that your flyer communicates all necessary information clearly and effectively to your audience.
Provide basic info
- Title: Give your flyer an interesting name.
- Type: Choose the category that best describes your flyer. Whether it's for athletics, sports, art, or camping, selecting the appropriate type allows you to better target your audience.
- Physical Address: Specify the event's location. A clear address helps parents know exactly where they need to go, making it easy to arrange their visit.
- Primary Featured Link: Select the main link to help parents take action on this flyer. This should be the link that you want to highlight or that provides the most important action.
- Other Featured links: You have the option to add multiple links. These will be included in the email, offering more resources or information to your audience.
Link Label Options
Choose the different options for the links:
Sign up, Call, Email, Get app, Learn more, Order, Join meeting, Subscribe, Survey, RSVP, Register, Download. For these actions, you'll need to provide specific details directly:
- Call: for phone numbers only.
- Email: for email addresses only.
- Get app: to download apps only.
For these actions, simply enter a URL and specify the action to inform about the purpose of the link:
- Sign up
- Learn more
- Order
- Join meeting
- Subscribe
- Survey
- RSVP
- Register
- Download
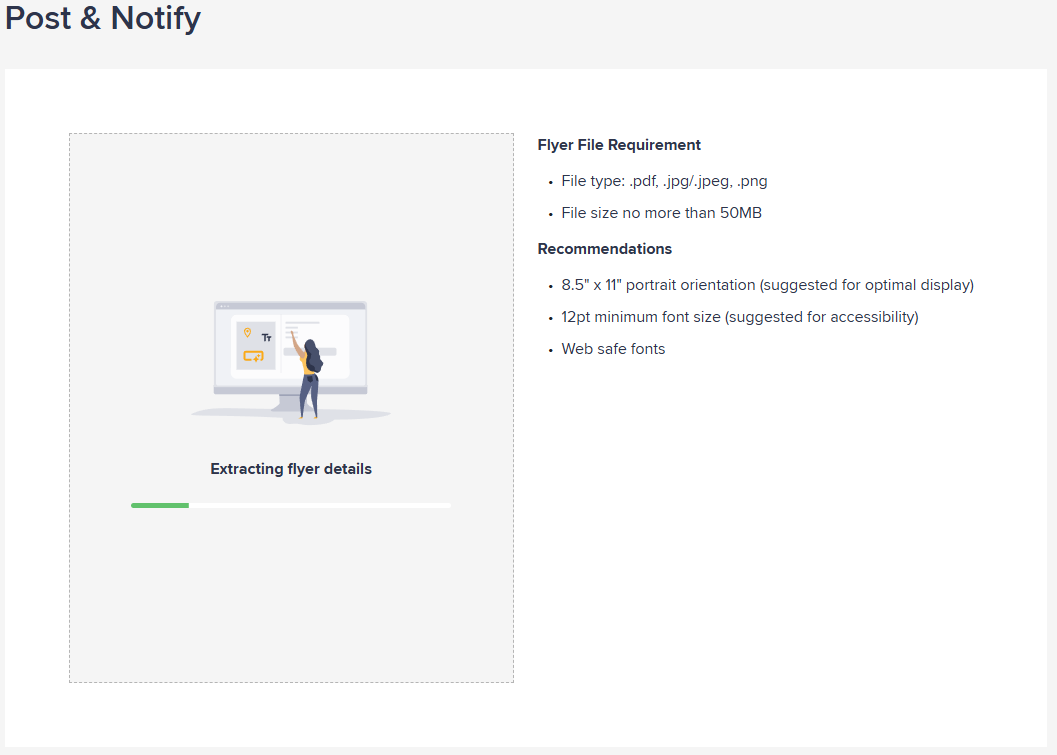
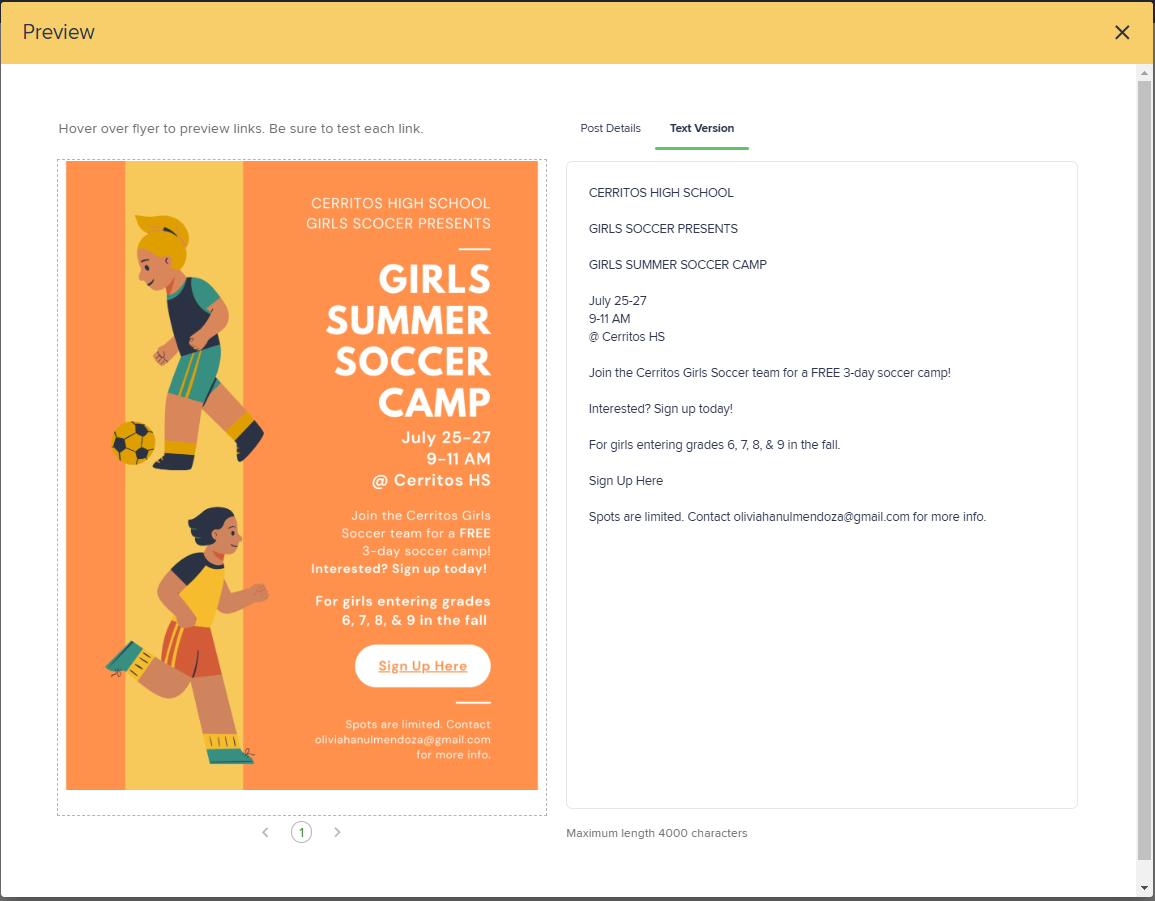
Review and Edit Text Version
To help users leveraging assistive technology (screen readers, braille reader, etc.) read your flyer, we extracted its content and established a text version of your flyer. This ensures that all flyers are accessible to parents using screen readers by providing WCAG 2.1 AA compliant text versions of flyers. This text is embedded alongside flyers for screen readers to access. If your district is also leverage AiDA as an add-on, a structured HTML version of the flyer is also made available under a Text Version link provided alongside the flyer details. This text version meets WCAG 2.2 guidelines and raises the bar higher for various assistive technologies and overall accessibility.
Depending on the complexity and design of your flyer may require you to edit the text version to ensure proper context. Please review carefully to ensure the text version of your flyer is correct.
Click on “Text Version” to edit the information on your flyer. Once you finish editing, close the window to continue adding the flyer details.
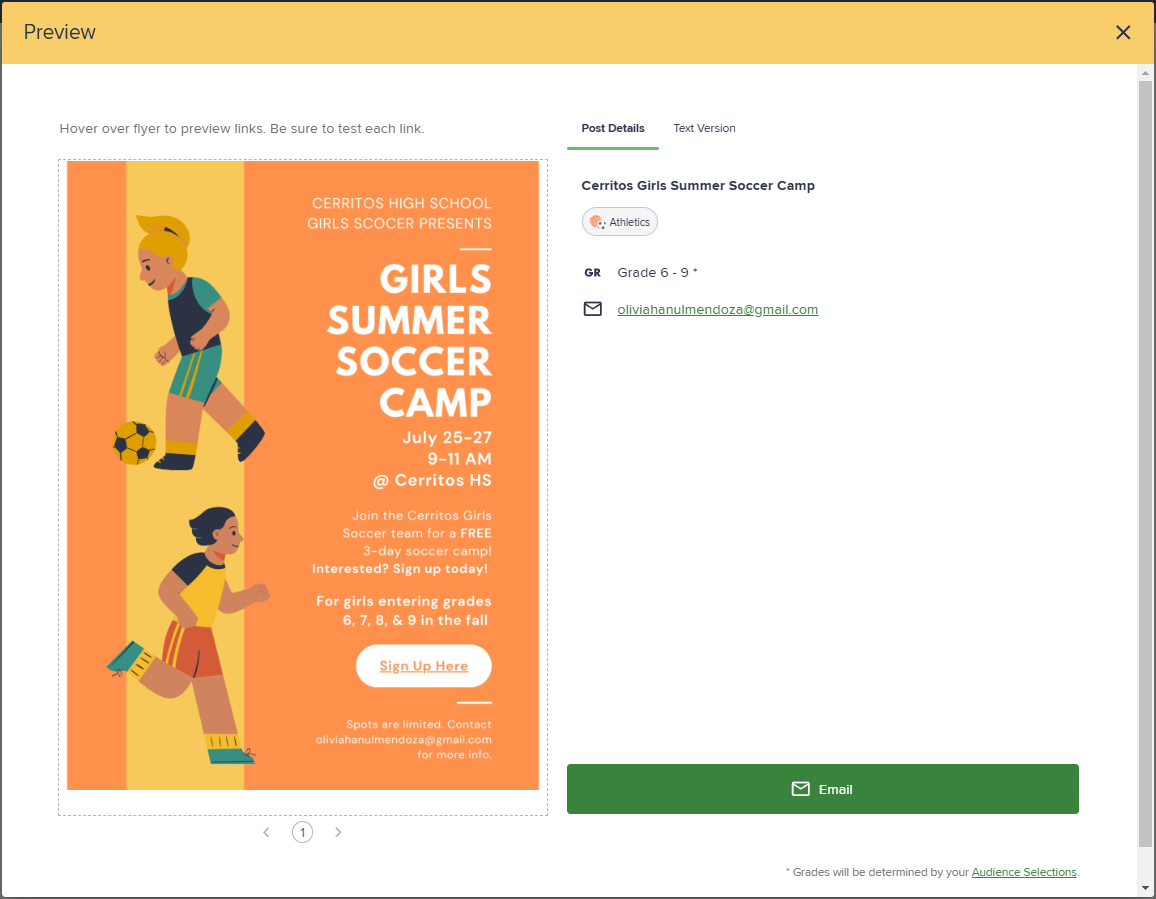
Preview Flyer
Review the links over your flyer, you can hover over to make sure they are working correctly. Close the window once you are finished.
Reupload Flyer
If you need to change or reupload your flyer, simply click the button to go back to the initial stage and upload the new version.


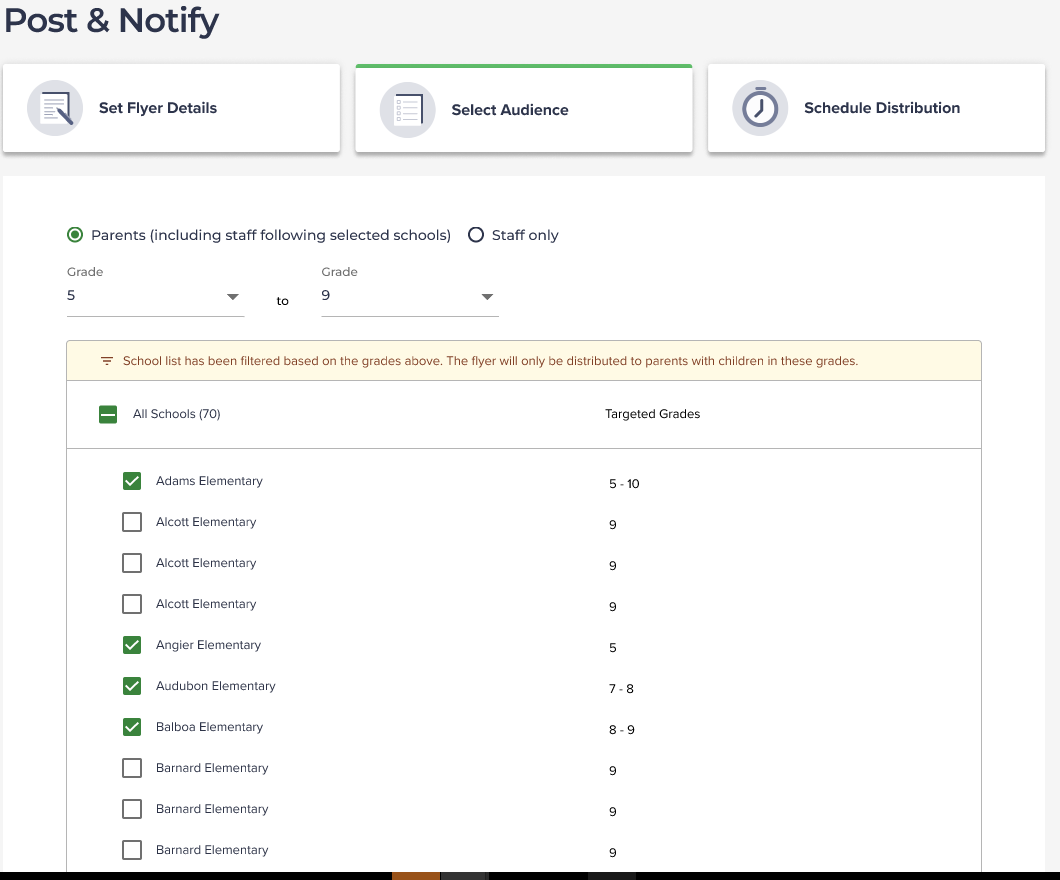
Change audience
Parents (including staff following selected schools)
First, select which type of audience you want to distribute the flyer to (Parents or Staff) and then select the applicable schools.
District Uploaders can select all schools in their district, a subset of schools, or an individual school of parents or staff / volunteers. When distributing flyers to staff / volunteers.
District Uploaders can also select the district office site. School Uploaders can only distribute flyers to the school sites they are associated with.
Staff only
Alternatively, flyers can be distributed to all of the school district’s staff and volunteers or to the staff and volunteers at selected school sites by picking the "Staff" option. The flyer will be distributed to both parents and staff at the schools selected above. The staff of the school are by default following their school.
Target grades (Optional)
Select a set of schools by specifying the schools’ grade range. Selecting a set of schools by specifying the schools’ grade range results in flyers being distributed to all parents subscribed to each relevant school.
Example: if you limit the schools' grade range to 3-5, all parents who subscribe to schools with 3rd, 4th, or 5th grade will receive the flyer.
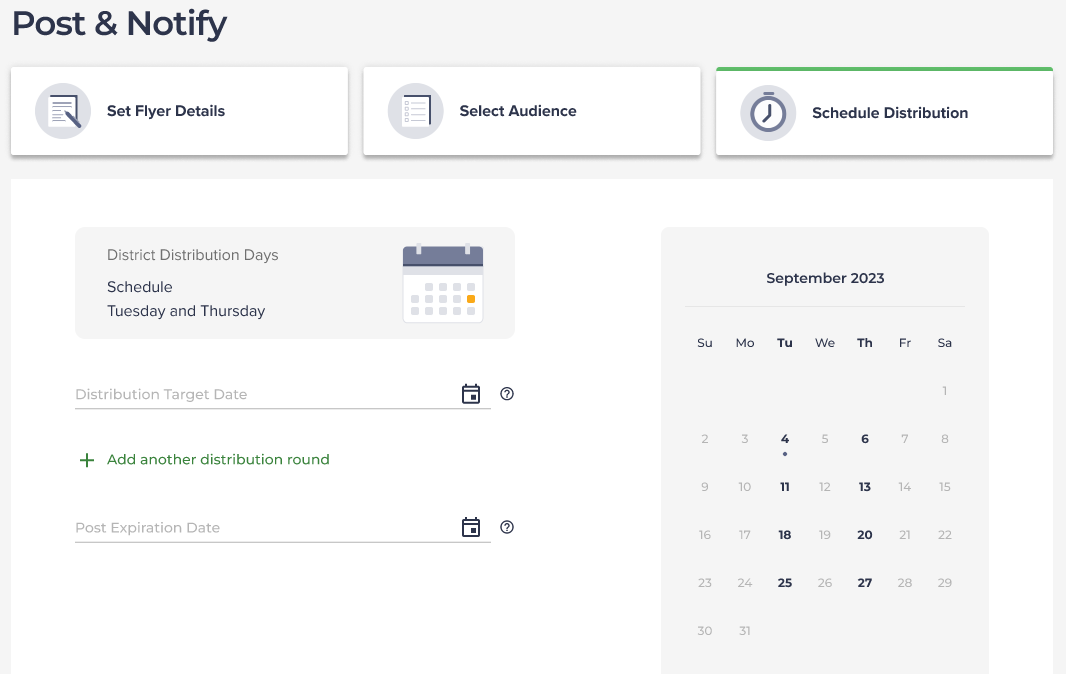
With each distribution round, you can select the date you want to distribute your flyer, which will be posted on the web flyerboards of the chosen schools and parents.
-
As a district/school staff uploader, select a target distribution date up to the next scheduled distribution date to potentially send urgently to parents.
-
The date picker should allow selection of any day up to the next scheduled distribution date.
-
Choose another target distribution round that is 28 days after the initial distribution; if you need more distributions, click "+" to add them.
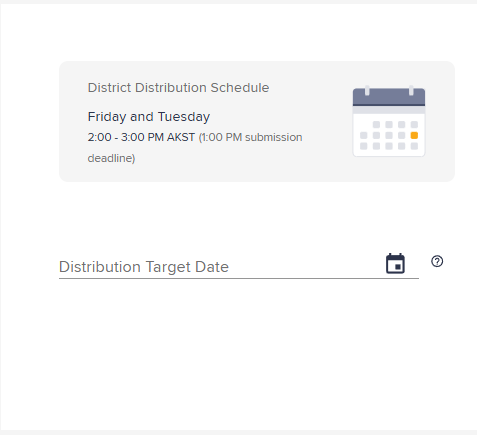
District distribution days
As a district you will be able to see the Schedule days, so you can choose a target date for your flyer.
-
As a district/school staff uploader, select a target distribution date up to the next scheduled distribution date to potentially send urgently to parents.
-
The date picker should allow selection of any day up to the next scheduled distribution date.
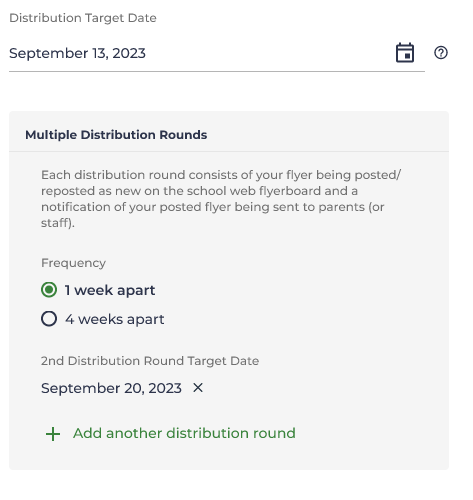
Multiple distribution rounds
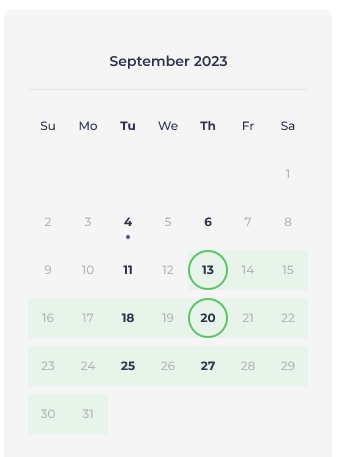
Select your next target distribution date with options of either 1 week or 4 weeks apart from the previous one. This date will be aligned with the upcoming distribution schedule. The calendar allows you to visualize the distribution schedule, letting you pick the best days to schedule the flyer.
To add more distribution rounds, click "+ Add another distribution round."
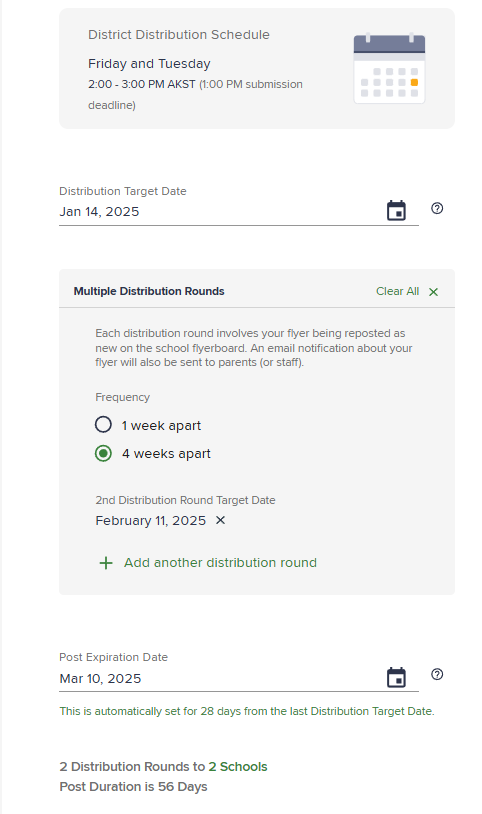
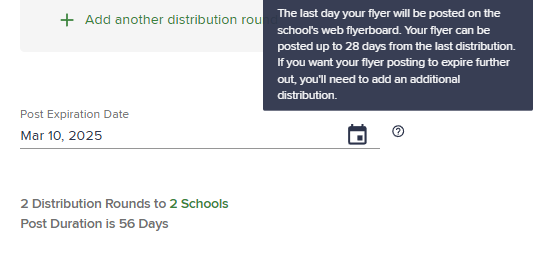
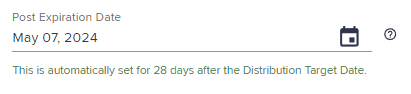
Post Expiration Date
Add the date you want the flyer to expire. The Post Expiration Date is automatically set in 28 days. District/School users can expire the flyer anytime within the current school year.
Weekly Distribution
As a district or school staff or volunteer, you have the option of distributing a flyer weekly (7 days) or monthly (28 days) if you prefer multiple distributions. You can design a multiple-distribution strategy based on your frequency preferences.
Now you can select a target distribution date, it automatically sets the post-expiration date to be 28 days later.
Click “Add Another Distribution” button, a Multiple Distribution section will appear, allowing the user to select the frequency and see a preview of their later distribution date.
The flyer will be queued to be distributed on your target distribution date if the school does not have any approval process. Additionally, to check up on the status of your flyer, you can go to Reporting to check the status of your flyer.
We hope Peachjar simplifies and streamlines your flyer distribution to parents.
If you have any questions or feedback, please do not hesitate to contact us.
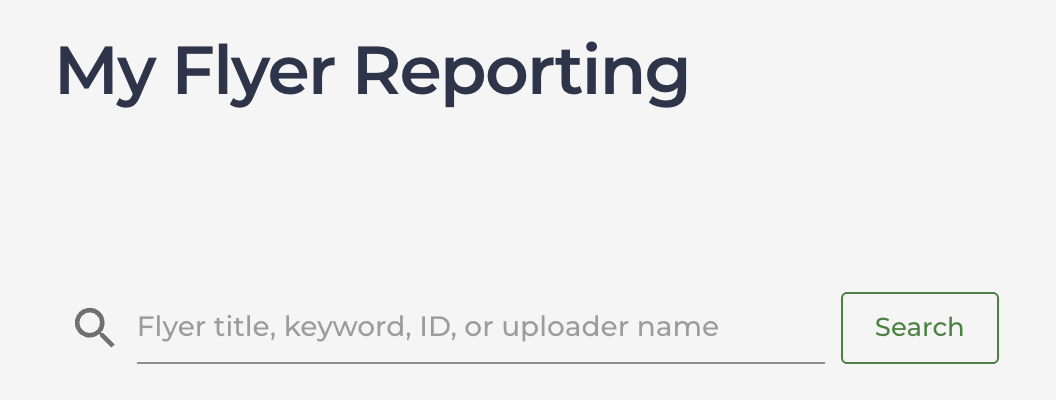
After approval and distribution the flyer will start collecting metrics that you can access through reporting. When accessing reporting you will see a list of all the previous flyers that have been submitted. To navigate across multiple campaign distributions you can use search and export capabilities to find and analyze specific flyers.
Search Functionality
- Use the search bar to quickly locate a flyer by its title, keyword, ID or uploader name.
- This is especially useful if you manage multiple campaigns simultaneously.
- We provide 15 months of reporting results for historical tracking. Any campaigns created more than 15 months ago will not be available in the reporting section.
Report List Export
When accessing the report list for your historical campaigns, there is an option to export all results.
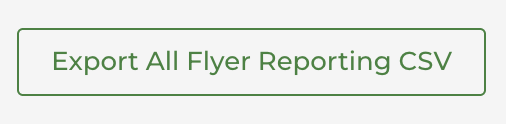
This will provide you with a CSV download of all the campaigns that you have access to that were created within the last 15 months.
The following fields are available across the campaigns that are accessible to that user:
- Flyer ID: Peachjar flyer ID assigned when campaign is created.
- Flyer title: Flyer title specified during campaign creation
- Submitted date: Date that the flyer was submitted for approval and distribution. This is not the date that the flyer was approved and distributed.
- Distribution round: The round that the flyer is currently on or ended on.
- Schools distributed (count): Total number of schools distributed to.
- Total Deliveries: Number of emails delivered to a valid inbox..
- Total Impressions: Number of emails opened and instances the flyer was displayed to users.
- Total Views: Number of instances the full flyer webpage was viewed by users.
- Total Actions: Number of actions taken from emails and on full flyer webpage such as Save Flyer, Share, Sign Up, Learn More, etc
View Report
For more detailed information, click on the View Report button. This opens a dedicated page for the selected flyer.
Flyer Campaign Details
Each flyer report is listed with its essential campaign details.
- Submission Date: The date on which we submitted the flyer for distribution.
- Distribution Target Date: The desired target date indicated when uploading the flyer.
- First Distribution Date: The date on which parents or staff received the flyer for the first time.
- Last Post Expiration Date: This refers to the date on which the flyer will no longer be visible on flyer boards.
- Type: The flyer type selected for the campaign during flyer upload (academics, arts & culture, college & career, family support, etc.). Up to two can be selected.
- Schools Targeted: Total number of schools the flyer was delivered to.
- Distribution Rounds: Total and current number of rounds the flyer is being distributed for.
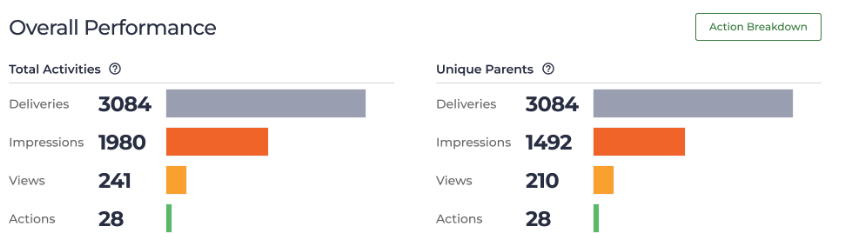
Core Metrics
There are four core performance metrics that are available on each report.
- Deliveries: Number of emails delivered to a valid inbox.
- Impressions: Number of emails opened and instances the flyer was displayed to users.
- Views: Number of instances the full flyer webpage was viewed by users.
- Actions: Number of actions taken from emails and on full flyer webpage such as Save Flyer, Share, Sign Up, Learn More, etc
Metric Details
The core metrics are also provided with various breakdowns and dimensions in order to better understand and evaluate performance.
Engagement & Reach
At the top of the report we capture the total engagement and reach of the flyer campaign.
- Total Activities: Measures the total amount of engagement recorded for one flyer, including multiple interactions by the same user.
- Unique Activities: Measures reach by counting each user’s interaction only once per activity type, regardless of how many times they engage.
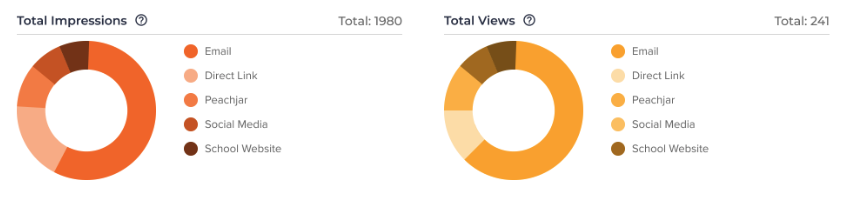
Source
Charts are provided showing a breakdown of your total impressions/views by source. This is tracking where your audience is coming from. This is captured by looking at where the user just came from in order to access flyer content.
- Email: - User came from the notification email distributed by Peachjar.
- School Website: - User came from a school website
- Social Media: - User came from a flyer link that was shared on social media.
- Shared Link: - User came from a shared link pulled from the parent app.
- Direct Link: - User came to the page directly with no history indicating source.
- Peachjar: - User found the content while exploring the Peachjar app.
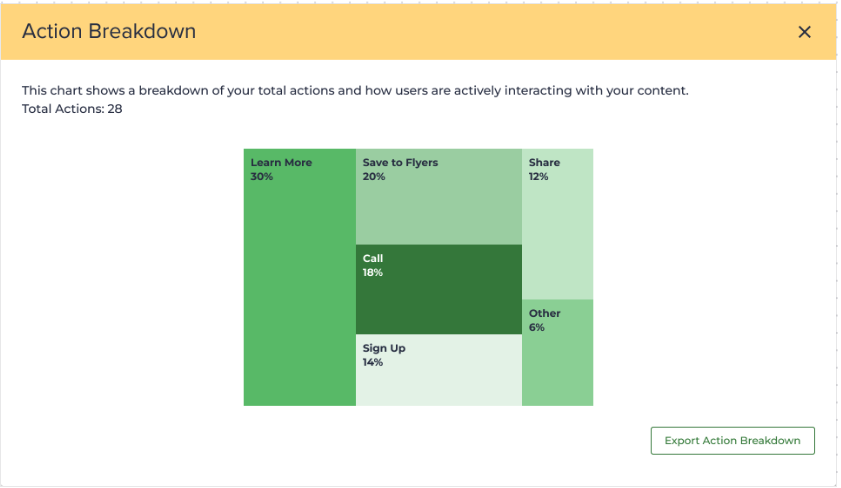
Actions
By clicking on the action breakdown button you can get a detailed insight into the total actions taken by users and how users are actively interacting with your content. You can also export this data into a CSV.
Flyer Status
At the bottom of each report you can get a detailed view of the current status of the flyer for each district. In addition, critical dates are provided in order to understand the distribution history for that content.
- Submitted: The date that the flyer was submitted to the district.
- Scheduled: The date that the flyer was scheduled to be distributed. If the flyer is pending with the district it will show a Pending Approval status. If denied it will show that the flyer was denied and provide the denial reason.
- Active: Indicates if the flyer is currently active and the date that it went active for that district.
- Expired: Indicates if the flyer was expired or removed and the date when that status change occurred.
This data can also be exported into a CSV by clicking on the ‘School Distribution CSV’ button. This will provide a more detailed view of the flyer statuses broken down by individual schools.

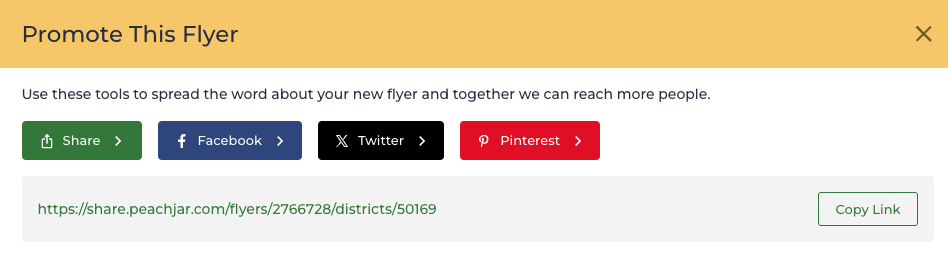
Promote Flyer
At the top of the report there is also a button to ‘Promote This Flyer’. This will give you quick access to promote the flyer link across various social media sites, email, text, chat, etc.
Flyer Templates

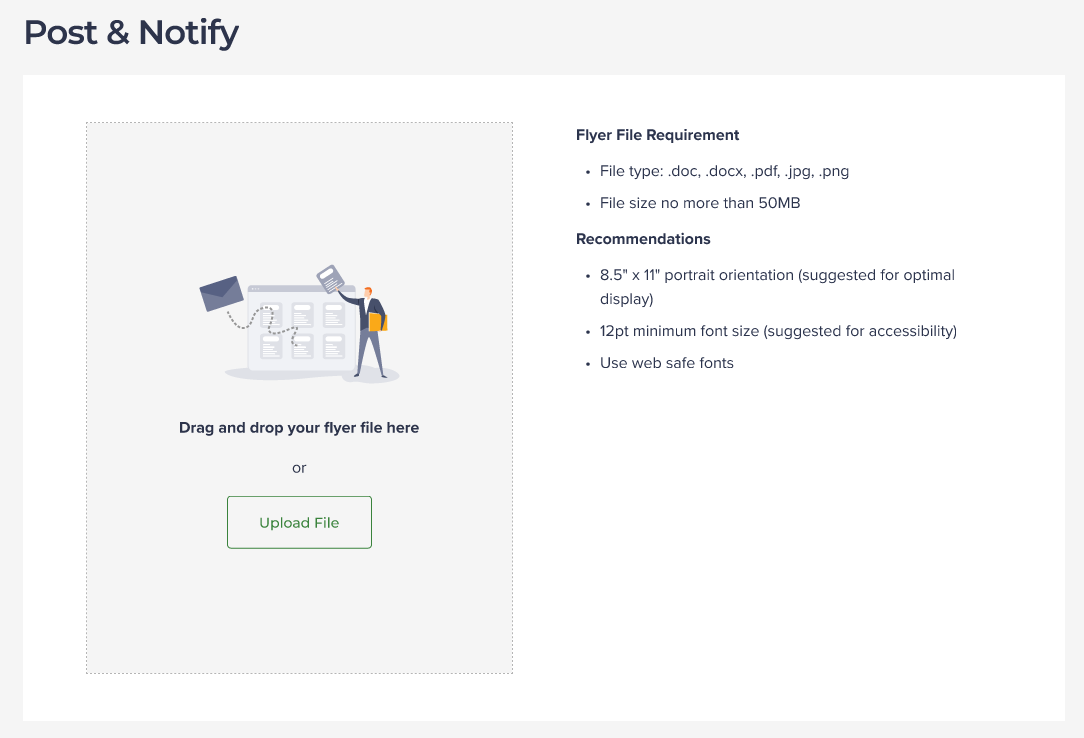
Post & Notify
Submit your flyer to be distributed to parents at your selected schools. Your flyer will be posted on the selected schools’ web flyerboards and sent in an email notification to parents.
Use the following requirements and submit your first flyer, click on "Post & Notify."
Prepare Flyer
Use the following requirements:
Supported formats: pdf, jpg/jpeg, png, tiff, bmp.
Not supported formats: Gif and Vector
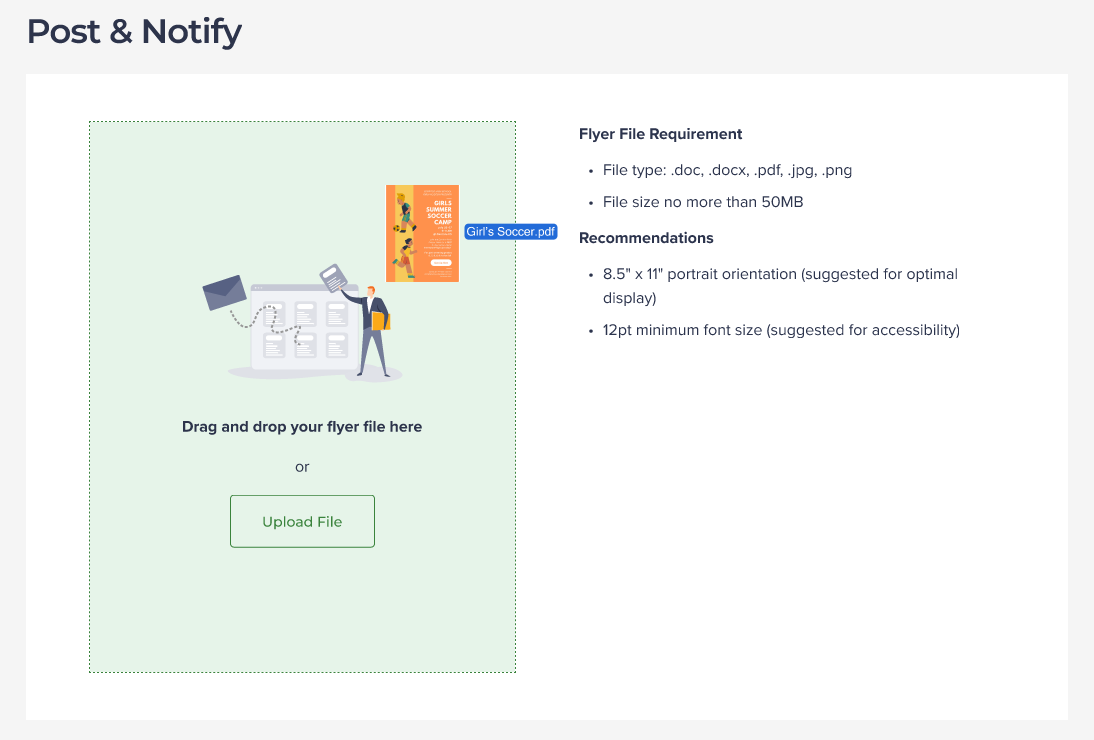
Upload Flyer
Once your flyer is in PDF format, click "Upload PDF File."
Click "Continue to Flyer Review."
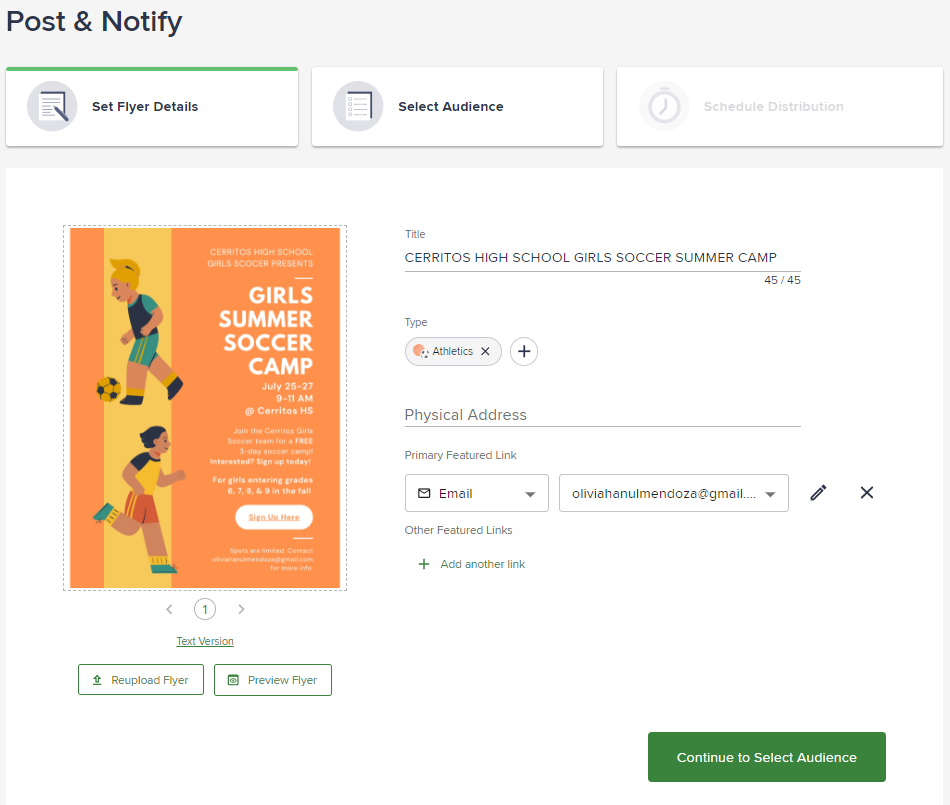
Set Flyer details
Specify everything from the event's title and type to its location and feature links. This step ensures that your flyer communicates all necessary information clearly and effectively to your audience.
Provide basic info
- Title: Give your flyer an interesting name.
- Type: Choose the category that best describes your flyer. Whether it's for athletics, sports, art, or camping, selecting the appropriate type allows you to better target your audience.
- Physical Address: Specify the event's location. A clear address helps parents know exactly where they need to go, making it easy to arrange their visit.
- Primary Featured Link: Select the main link to help parents take action on this flyer. This should be the link that you want to highlight or that provides the most important action.
- Other Featured links: You have the option to add multiple links. These will be included in the email, offering more resources or information to your audience.
Link Label Options
Choose the different options for the links:
Sign up, Call, Email, Get app, Learn more, Order, Join meeting, Subscribe, Survey, RSVP, Register, Download.
For these actions, you'll need to provide specific details directly:
- Call: for phone numbers only.
- Email: for email addresses only.
- Get app: to download apps only.
For these actions, simply enter a URL and specify the action to inform about the purpose of the link:
- Sign up
- Learn more
- Order
- Join meeting
- Subscribe
- Survey
- RSVP
- Register
- Download
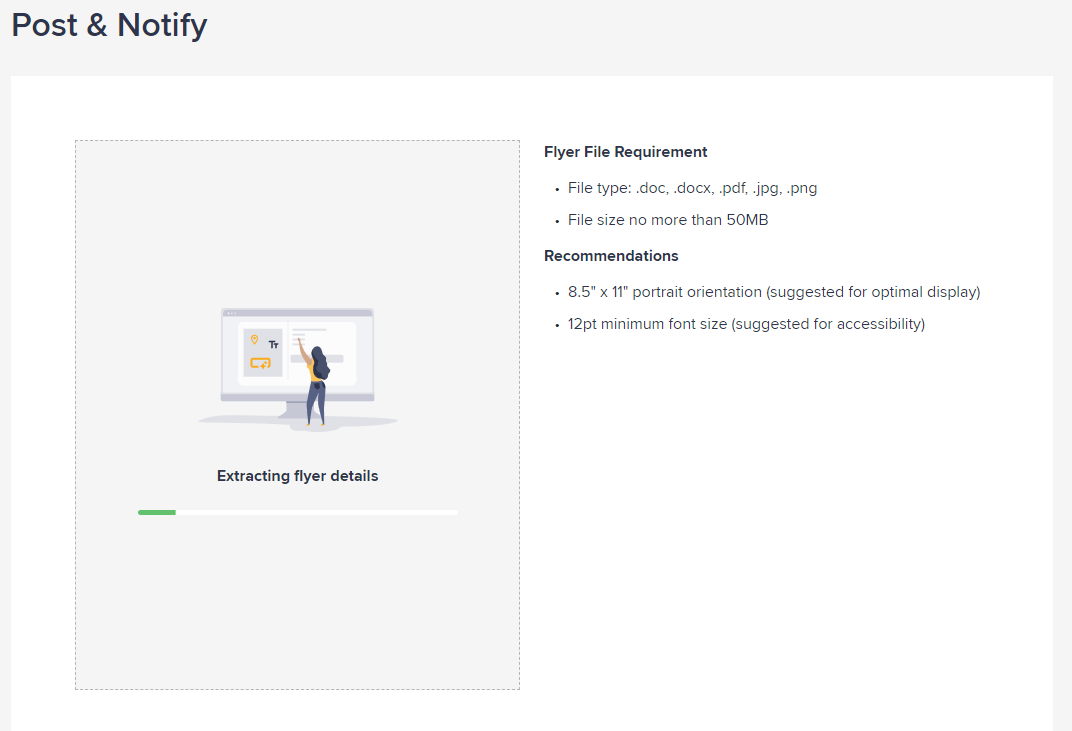
Review and Edit Text Version
To help blind or visually impaired recipients to read your flyer, we extracted its content and established a text version of your flyer. The design of your flyer may require you to edit the text version. Please review carefully to ensure the text version of your flyer is correct.
Click on “Text Version” to edit the information on your flyer. Once you finish editing, close the window to continue adding the flyer details.

Preview Flyer
Review the links over your flyer, you can hover over to make sure they are working correctly. Close the window once you are finished.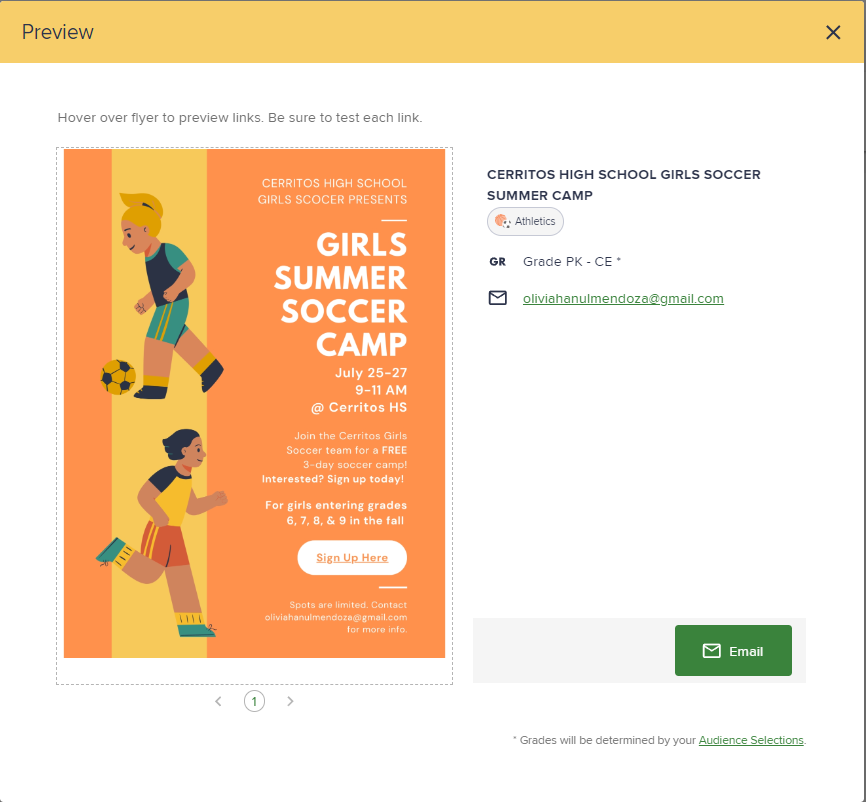
Reupload Flyer
If you need to change or reupload your flyer, simply click the button to go back to the initial stage and upload the new version.
Select Audience
Change audience
Parents (including staff following selected schools)
First, select which type of audience you want to distribute the flyer to (Parents or Staff) and then select the applicable schools.
District Uploaders can select all schools in their district, a subset of schools, or an individual school of parents or staff / volunteers. When distributing flyers to staff / volunteers.
District Uploaders can also select the district office site. School Uploaders can only distribute flyers to the school sites they are associated with.
Staff only
Alternatively, flyers can be distributed to all of the school district’s staff and volunteers or to the staff and volunteers at selected school sites by picking the "Staff" option. The flyer will be distributed to both parents and staff at the schools selected above. The staff of the school are by default following their school.
Target grades
Select a set of schools by specifying the schools’ grade range. Selecting a set of schools by specifying the schools’ grade range results in flyers being distributed to all parents subscribed to each relevant school.
Example: if you limit the schools' grade range to 3-5, all parents who subscribe to schools with 3rd, 4th, or 5th grade will receive the flyer.
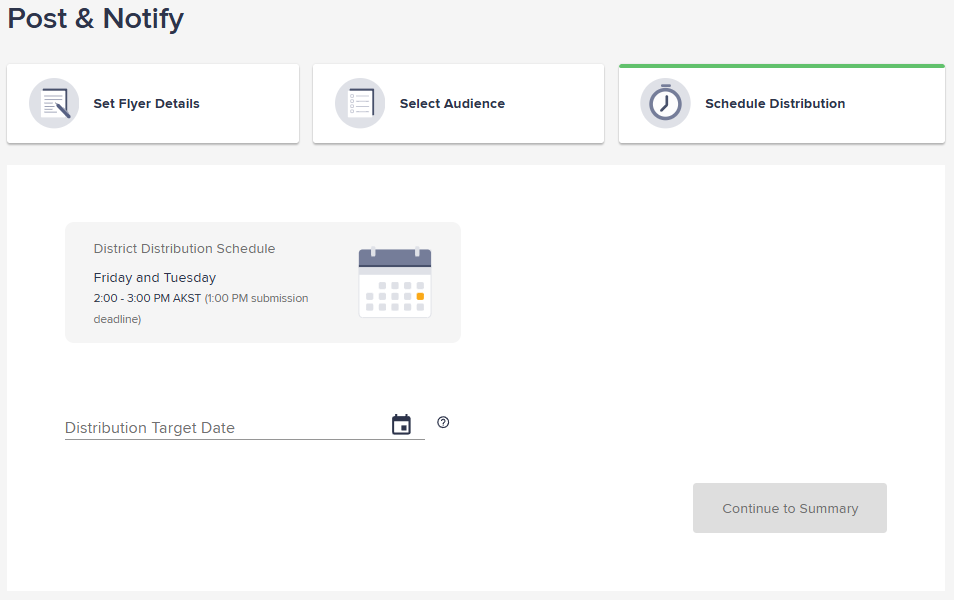
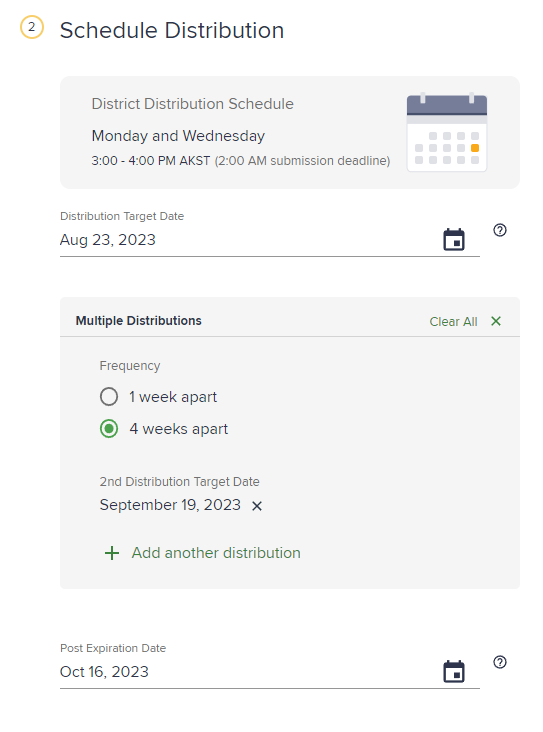
Schedule Distribution
With each distribution round, you can select the date you want to distribute your flyer, which will be posted on the web flyerboards of the chosen schools and parents.
-
As a district/school staff uploader, select a target distribution date up to the next scheduled distribution date to potentially send urgently to parents.
-
The date picker should allow selection of any day up to the next scheduled distribution date.
-
Choose another target distribution round that is 28 days after the initial distribution; if you need more distributions, click "+" to add them.
District distribution days
As a district you will be able to see the Schedule days, so you can choose a target date for your flyer.
- As a district/school staff uploader, select a target distribution date up to the next scheduled distribution date to potentially send urgently to parents.
- The date picker should allow selection of any day up to the next scheduled distribution date.
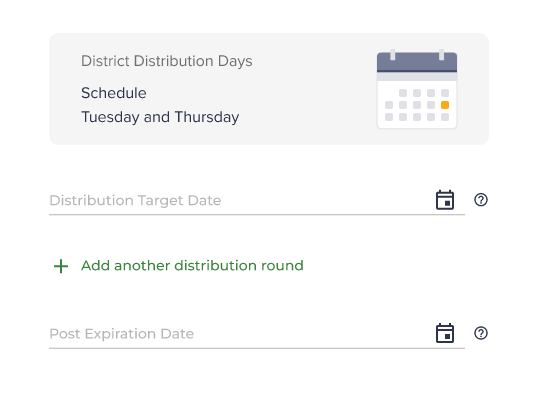
Multiple distribution rounds
Select your next target distribution date with options of either 1 week or 4 weeks apart from the previous one. This date will be aligned with the upcoming distribution schedule. The calendar allows you to visualize the distribution schedule, letting you pick the best days to schedule the flyer.
To add more distribution rounds, click "+ Add another distribution round."
Post Expiration Date
Add the date you want the flyer to expire. The Post Expiration Date is automatically set in 28 days. District/School users can expire the flyer anytime within the current school year. The end date of a school year is July 31st.
Weekly Distribution
As a district or school staff or volunteer, you have the option of distributing a flyer weekly (7 days) or monthly (28 days) if you prefer multiple distributions. You can design a multiple-distribution strategy based on your frequency preferences.
Now you can select a target distribution date, it automatically sets the post-expiration date to be 28 days later.
Click “Add Another Distribution” button, a Multiple Distribution section will appear, allowing the user to select the frequency and see a preview of their later distribution date.
Limitless School Distribution
Recent changes in flyer distribution across our school system have resulted in substantial gains for staff and volunteers.
Key benefits include less frustration for staff uploaders, who no longer have to do multiple uploads for flyers with different distributions or those that need support for more than one language. As a result, the amount of school content available to parents has increased slightly.
The ability for employees and volunteers to publish flyers for longer than 28 days and distribute them weekly instead of just monthly is one of the important factors that has enabled these improvements.
You can add as many PDF pages as can fit in a 50 MB file, instead of being limited to 4.
Note: It's important to remember that these features are only for the benefit of staff and volunteers, not organizations. They help them interact more effectively with parents and the school community.
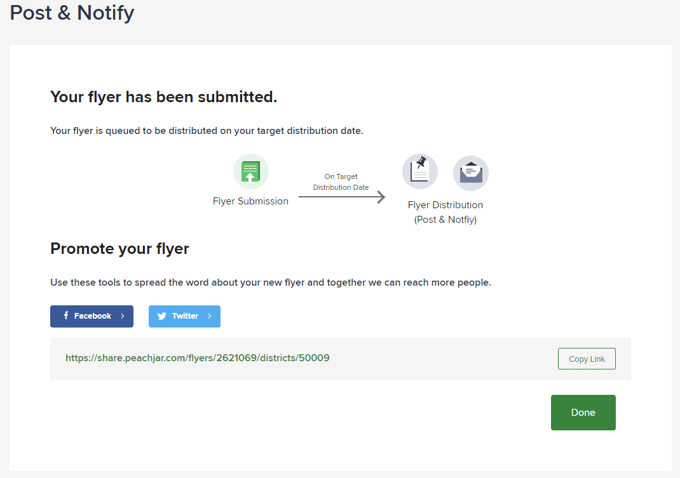
Your Flyer has been Submitted
The flyer will be queued to be distributed on your target distribution date if the school does not have any approval process. Additionally, to check up on the status of your flyer, you can go to Reporting to check the status of your flyer.
We hope Peachjar simplifies and streamlines your flyer distribution to parents.
If you have any questions or feedback, please do not hesitate to contact us.